Answered on this page:
- What are the steps of the laser engraving process?
- How does laser engraving work?
- What are the benefits of using laser engraving?
- What is the difference between laser marking, etching and engraving?

Laser engraving technology is becoming increasingly accessible to craftspeople and fabricators everywhere, allowing a new generation of makers to access a world of options for realizing their do-it-yourself art and manufacturing projects. Although laser engravers can now be rented and operated by virtually anyone, there is still little transparency into how these machines actually function and what steps are required to operate one.
Creating your first laser engraving project can be an intimidating process, but it doesn’t have to be. Whether you’ve never worked with design software, or you’re just new to working with complex technology, laser engraving is actually a relatively straight-forward process that enables folks without much expertise to create something truly beautiful at a relatively low price point.
To help make your first laser engraving experience as productive and painless as possible, we’re offering this very simple guide that covers the five main steps of the laser engraving process. As with most applications of art and technology, the best way to learn is by doing, but this article will help you understand what the differences are between laser engraving, marking, and etching, how laser engraving machines actually work, what steps are required to use one, and how you’ll benefit from using laser engraving to mark your products. Enjoy!
The Differences Between Laser Marking, Etching and Engraving
This article focuses on the steps for a successful laser engraving project, so it’s important that we clearly define what laser engraving is before we start digging deep. Laser engraving, laser marking, and laser etching all describe similar processes and are sometimes used interchangeably, so here are the subtle differences between them:
 Laser engraving is a process where a high-powered laser is used to physically remove the surface layer of the material, creating a cavity that reveals an image.
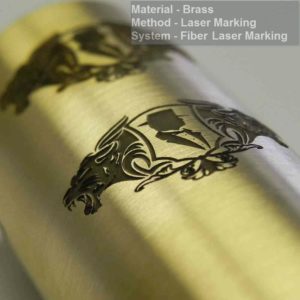
Laser marking uses a lower-powered laser to create high-contrast markings on the surface of a material without disrupting the material itself. This means that the surface of the material is discolored but left intact, unlike laser engraving, which actually removes part of the surface of the engraved material to leave an image.

Laser etching is a process where a high-heat laser beam is used to melt the surface of the target material. The melted material expands and causes a slightly raised mark that reveals the desired image. While laser engraving removes as much as two one-hundredths of an inch of material from the surface of the material to create a discernible cavity, laser etching melts just the first thousandth of an inch from the surface of the material.
Although all three processes can produce images on a variety of materials, they use lasers to interact with the materials quite differently. The important thing to remember about laser engraving is that it creates a cavity by vaporizing the surface of the material with a high-heat laser. Laser etching melts the top layer to create a raised image, and laser marking creates images by creating markings without disrupting the material.
 Five Steps of the Laser Engraving Process
- Ideation is the first and most important step of the laser engraving process. It’s up to you, the artist, to decide what it is you would like to engrave and the kind of material that you would like to use. Laser engraving is a highly versatile method. You can use stone, glass, plastics, coated or non-coated metals, and natural substrate like wood as your material, and the options for what exactly to engrave are only limited by your own creativity. You can find great project ideas all over – try drawing inspiration from your environment, or look around the internet for some projects that might interest you.
- Once you’ve got a great idea, you can start your laser engraving project by designing your desired image or text. Design for laser printers is done on computer programs, but it’s important to ensure that the laser engraving machine that you intend to use is compatible with the files generated by your choice of design software. Some laser engraving machines come with their own software, while others are designed for compatibility with existing software options, like Adobe Illustrator. Once your design is finished, it will be sent to the laser engraver through the printer dialogue.
- Now it’s time to place your chosen materials into the laser engraving machine and choose what settings you want to use. Depending on the laser engraver and software, you can control the strength of the laser, depth of the cut, the speed, number of passes, line thickness, and other variables. It is recommended that you test your materials under a variety of different conditions to determine what settings give the desired result.
- Once you’ve figured out the settings you want and placed some new materials in the laser engraving machine, it’s time to press the start button and watch the laser engraving machine produce your unique design. This is the fun part!
- When the laser is finished engraving your design into the desired material, you can go ahead and remove the material from the machine. That’s all there is to it!
How Does Laser Engraving Work?
Now that you understand the basic procedure for creating your own laser engraving project, you may still be wondering what actually goes on inside the laser engraver – how does the machine actually work?
A laser engraving machine is a machine that uses complex parts and procedures to complete a relatively simple task – transferring data from a design file onto a physical object. Laser engravers have three main parts – the laser, the controller, and the surface. The laser is like the “pen” or “pencil” – it’s the object that actually creates the design by concentrating high-powered light onto the “surface”. For your project, the “surface” is whatever material you are trying to engrave.
The “controller” is the part of the engraving machine that controls the laser – it’s the “arm” that manipulates the “pen”, moving it over the surface and directing the power of the laser according to your design instructions. The movements of the controller and the power of the laser are controlled by the data in the design file you created. The magic happens when the software in the laser engraving machine converts your design into a vector map with X and Y axes. Once this happens, the controller and the laser can read the vector map and move correctly to create your design.
Benefits of Laser Engraving Your Products
Laser engraving is a versatile creative method with virtually limitless applications. Engraving is ideal for products that are expected to experience a lot of use, because the deep markings mean that the engraved image won’t fade easily over time. Laser engraving is also a high-speed process, meaning that you can produce a lot of engravings on a per-hour basis, and except for the initial design and testing, the process is fully automated.
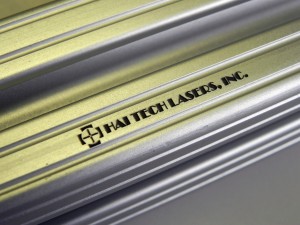
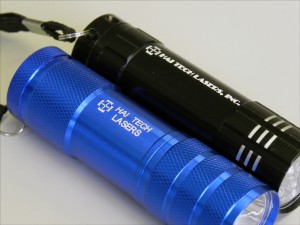
Laser engraving can be used to mark serial numbers, logos, or product identification numbers, but the most common uses are personal – engraving artwork, initials and other text on keepsake items is one of the best and most popular applications of laser engraving machines.
Conclusion
Technology should never be a barrier to entry for creators that want to access the most cutting edge technologies to help them make something beautiful. By now you should understand just how easy it is to get started with laser engraving. Whether you’re undertaking a new project yourself or passing off your designs to an expert engraver, you’re just a few simple steps away from turning your amazing idea into a product you can hold in your hands. For information about Hai Tech Laser’s services, click below:
Learn More

[…] at what’s possible when you finally get into a workshop and start the process for yourself. Laser engraving is a diverse application – it can be used to mark medical devices or aftermarket automobile […]